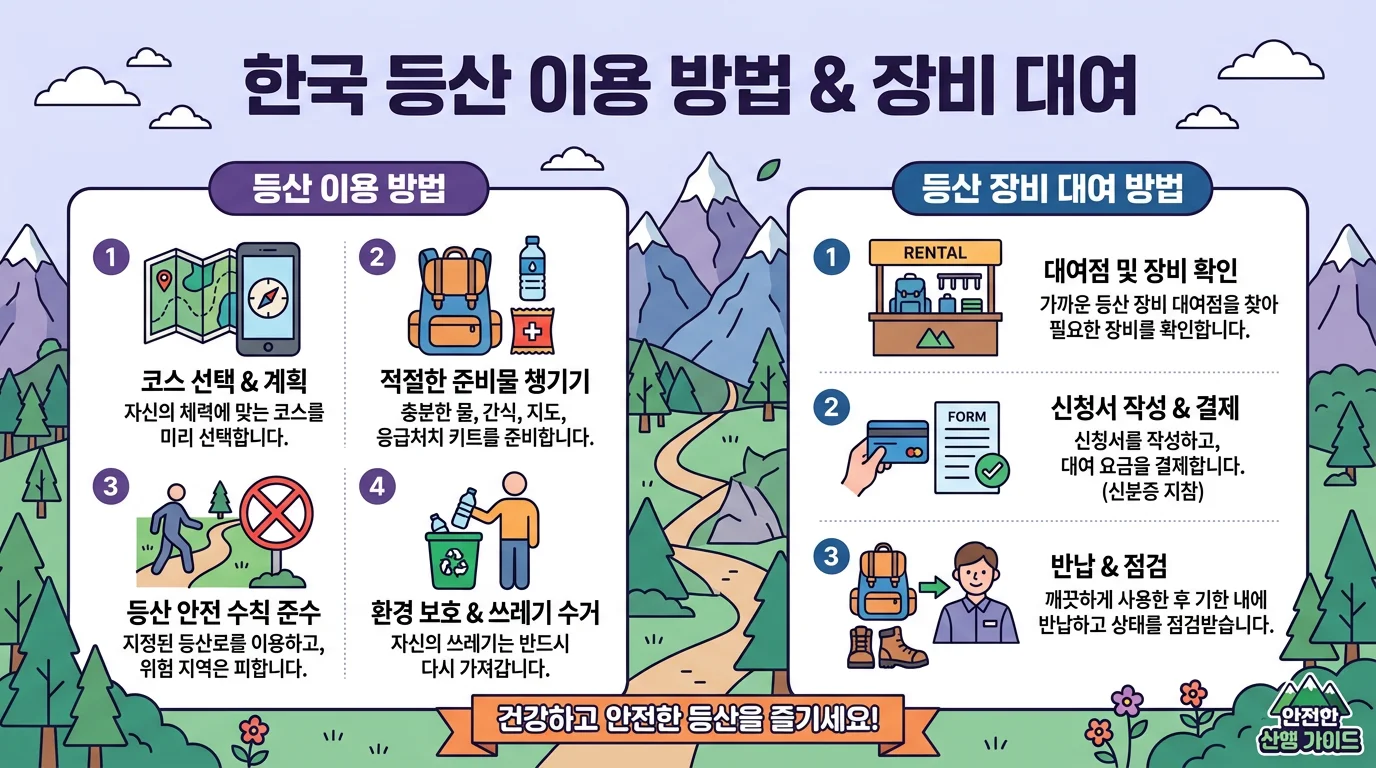
⛰️ The Complete Guide to Hiking in Korea & Renting Gear
1. Choosing a mountain (by difficulty)
If it's your first time, start with an easier mountain.
Namsan — The easiest, stroll-style course. You can even reach the top by cable car or bus! Best for beginners.
Inwangsan — City and palace views along a fortress-wall path (fairly light).
Bugaksan (Baegaksan) — Seoul fortress-wall trail with city views; a historical walk.
Achasan — Gentle, popular for sunrise hikes and light hiking.
Bukhansan — Seoul's iconic mountain. Courses range from beginner to advanced. (The Baegundae summit course is steep and rocky, so hiking boots are essential.)
Gwanaksan — A landmark mountain in southwestern Seoul with scenic rocky ridges (intermediate+).
💡 Even on the same mountain, difficulty varies a lot by course. Pick one that matches your fitness.
2. Getting there (public transit)
Most trailheads are a 5–15 min walk from a subway station.
e.g., Bukhansan → Bukhansan Ui Station (Ui-Sinseol Line; shortest route to Baegundae) / Gwanaksan → Gwanaksan Station (Sillim Line; right by the exit) / Namsan → bus or cable car from Myeongdong/Chungmuro / Bugaksan → bus from Anguk or Gwanghwamun
For directions and trail closures, use Naver Map, KakaoMap, or the Korea National Park Service app.
3. What to bring
For an easy mountain, this is enough.
Sneakers or hiking boots (boots recommended for the rocky courses on Bukhansan/Gwanaksan)
Water (500ml–1L), a light snack (gimbap, chocolate bar, etc.)
Hat & sunscreen, a light windbreaker (for changing weather), a power bank
Korean hikers tend to wear full hiking outfits, but light courses like Namsan, Inwangsan, and Achasan are fine in regular sportswear. Still, gear up properly for Bukhansan's summit course.
4. 🥾 How to rent gear
No gear? No worries. There are two main options.
Option 1. Seoul Hiking Tourism Center (recommended for foreigners ⭐)
Run by the Seoul Tourism Organization, this is a support facility for foreign hikers. There are currently 3 locations.
Bukhansan Center — 5-min walk from Bukhansan Ui Station (has an indoor climbing zone)
Bugaksan Center — a hanok (traditional house) building, near 88 Samcheong-ro, Jongno-gu
Gwanaksan Center — inside Gwanaksan Station (Sillim Line); excellent access
Items: hiking boots, jackets/hiking clothes (top & bottom), gloves, poles, and crampons in winter
Cost: roughly 1,100–2,200 KRW per item (cleaned & sanitized)
Eligibility: foreign tourists, or Koreans accompanying foreigners (gear rental isn't for Koreans alone)
Languages: English, Chinese, Japanese
Reservation: walk-in possible, but sizes may run out, so booking ahead is recommended (official site/SNS, usually a few days before)
Extras: coin lockers/luggage storage, lounge, changing rooms/showers (varies by center), course guidance
🔎 Hours, closing days, and reservation methods differ by center (e.g., the Bugaksan Center is closed on Tuesdays). Check the official site (seoulhiking.or.kr) before visiting.
Option 2. National Park visitor support centers (safety gear)
The Korea National Park Service offers safety-gear rentals at mountain national parks. Fill out a form at a visitor support center (e.g., on Bukhansan) to borrow gear.
Items (e.g.): crampons, poles, knee supports, first-aid kits — safety-focused
Usually same-day rental & return, and an ID (passport) may be required.
Items, cost, and availability vary by park and season, so check the official National Park Service info.
💡 Difference: Seoul Hiking Tourism Center = full set including boots & clothes (foreigners only, low cost) / National Park visitor center = mainly safety gear. To rent clothes and shoes too, the Seoul Hiking Tourism Center is easier.
5. 💡 Recommended course for foreigners (example)
From your accommodation (Myeongdong, Seoul Station, etc.), take the subway to Bukhansan Ui Station
Rent boots/poles and get course guidance at the Bukhansan Seoul Hiking Tourism Center
Hike a beginner/intermediate course for 2–4 hours to match your fitness
After descending, pick up your bags at the center and enjoy post-hike specialties nearby like dubu (tofu) hot pot, acorn jelly, and seafood pancake!
6. Good to know
🚻 Restrooms: There are rarely restrooms mid-trail. Go at the entrance or visitor center first.
💳 Little cash needed: National park admission is mostly free, and many centers/shops/parking lots take cards. (Rental fees are small.)
🐢 Pace: Korean hikers tend to move fast, but going at your own slow pace is totally fine. Don't overdo it!
🐗 Wildlife: You may see wild boar or water deer, but they mostly avoid people. Don't feed them or get close.
⏰ Entry hours: National parks have restricted sections before sunrise/after sunset. Avoid night hikes.
✅ Pre-hike checklist
Check the course, difficulty, and closures (hiking app)
Boots, water, snacks, windbreaker (rent at a center if needed)
Book the Seoul Hiking Tourism Center in advance (to secure sizes)
Bring your passport (may be needed for rentals)
Use the restroom at the entrance; bring a trash bag
Reference link in English:
Seoul Hiking Tourism info : https://seoulhiking.or.kr
🟦 A guide from the CultureHub team.
📅 Updated: 2026 · ⚠️ Center locations, hours, rental items/prices, and park closures may change. Check the Seoul Hiking Tourism Center (seoulhiking.or.kr) and the National Park Service before you go.